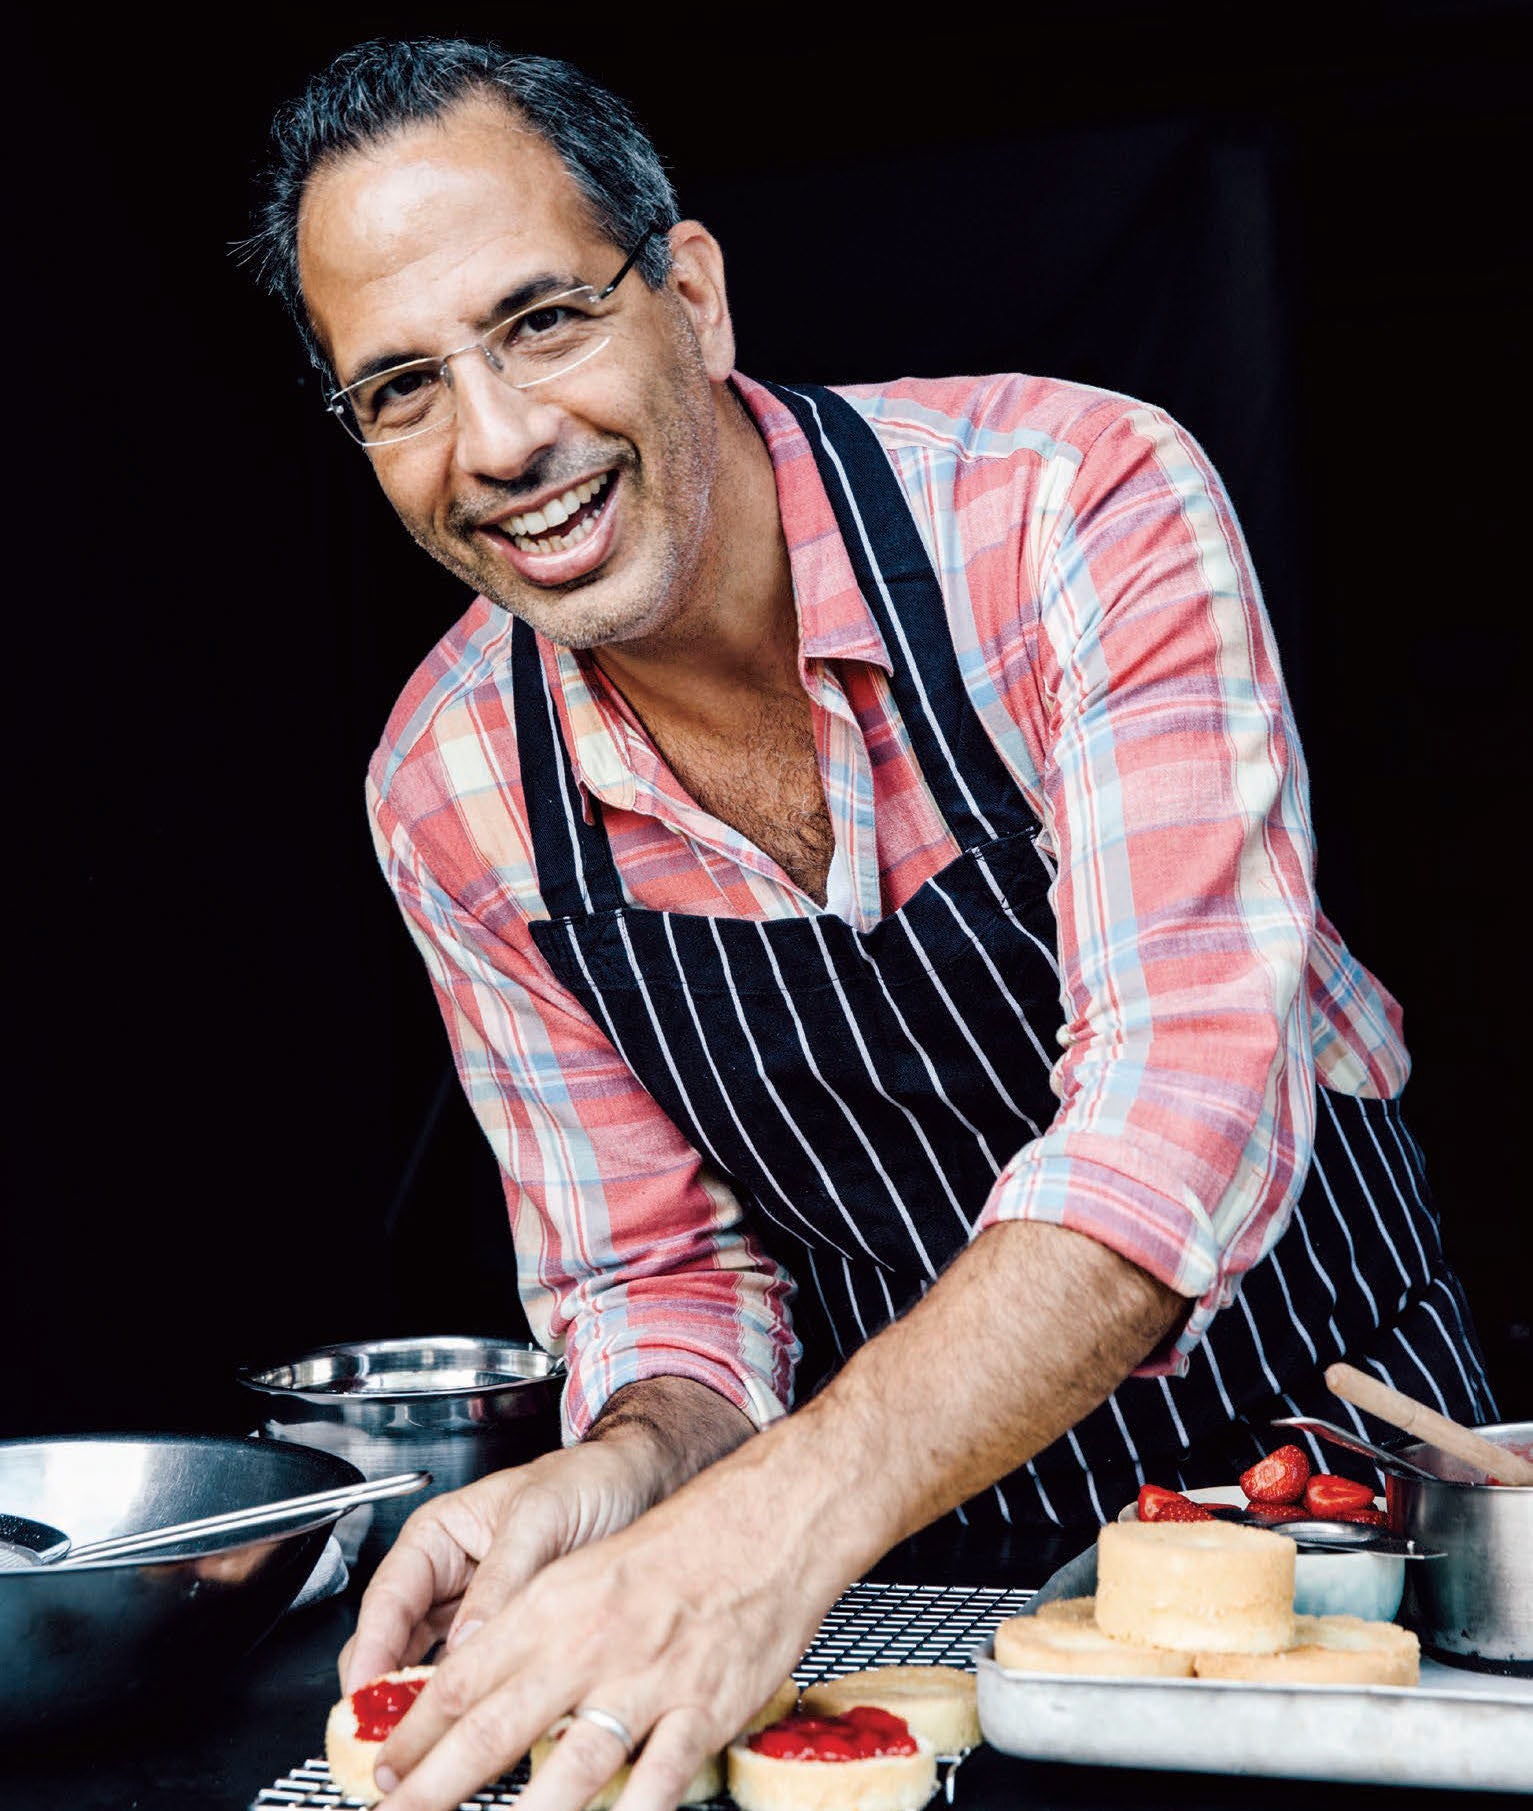
Can a home cook bake like a pastry chef at one of London’s most famous restaurants? Yotam Ottolenghi and Helen Goh think so.
In Plenty More, he brought us colorful vegetables, savory yogurt, and spices that our kitchens had never seen before. In Jerusalem, he taught us about the techniques, dishes, and political nuances that make up Israeli cuisine. Now, in Sweet, Yotam Ottolenghi is taking on the world of sugar with collaborator and pastry chef Helen Goh.
From playful, nostalgic treats like the Australian Yo-Yo cookie to refined chocolate tarts adorned with hazelnuts and rosemary, Ottolenghi and Goh have a restaurant-worthy dessert for every occasion. The book is equal parts accessibly classic and ambitious, and by the end, you’ll be crystalizing sage, candying rose petals, turning blackberries into bubblegum-pink glazes, and—realistically speaking? Probably Instagramming it all.
The editors of TASTE caught up with the two authors over a cup of coffee and a croissant while they were in Manhattan recently. We talked about the childishness of baking, dessert-induced guilt (or lack thereof), and digital scales. We all left wanting to swirl some glossy tahini into a pan of brownies.
A lot of the recipes in Sweet are very beautiful and manicured. Is there a difference between how you bake for your restaurants versus how you bake at home?
YOTAM: Yeah, I mean, baking in a restaurant or in our cafés is quite different in a few ways. First of all, you bake in big batches, and you create kind of your stock of things to use. It’s like cooking in a restaurant—a bunch of people work together to create a whole array of things that are used in different context. We have a massive tub of ganache in the fridge for all the cakes.
When we adapted those recipes for home cooks, we had to think, like, nobody’s going to make five components for a tart. Because it’s crazy. They’ll never make that tart again. So we had to condense certain things and simplify certain things. Some recipes just didn’t make it to the book because there were too many aspects of it. We wouldn’t want people to be put off by how complicated it is. But other cakes are just exactly like how we make them in the shop. Like the flourless chocolate cake in the bundt tin covered in chocolate. That’s really one of our oldest recipes in Ottolenghi, been serving it for 15 years.
It’s good business.
YOTAM: Yeah, it is. Chocolate is good business. Raspberries are good business. There’s certain things that people see and they’re just like—like magnets. Like completely drawn to them. So yeah. Every recipe has a slightly different story; some of them have been staples on our shelves for years, and we adjusted them for home cooks. Others needed very little adjustment. And then there’s those that we’ve actually introduced for the book, because we don’t have a lot of plated desserts, like a creme caramel, and certain things. But we wanted to make the book really an all-around, well-rounded book, so we would have a little for any person who wants to bake.
That’s a promise!
YOTAM: It’s a promise, because if you can read, you can follow a recipe; if you can follow a recipe, you can bake. Helen and I have been emphasizing it throughout the book too. Some people go, “Oh, I can’t bake, it’s too scientific for me.” I mean, it is chemistry, so with chemistry, you follow the instructions, it works. All you need to do is give yourself some time and you weigh the ingredients properly. You can guarantee the success, I mean, more so than if you cook a fish. Because no recipe would tell you how not to overcook a fish. You go, put it in the oven, cook it until it’s cooked.
Fish is a different size, different species.
YOTAM: Ten minutes—what 10 minutes? I mean, maybe if it’s 400 grams, but mine is 600 grams. So I just served raw fish. But with baking, recipes tell you how big the tin is, how high on your oven, how many minutes. You’re more or less guaranteed that it will succeed.
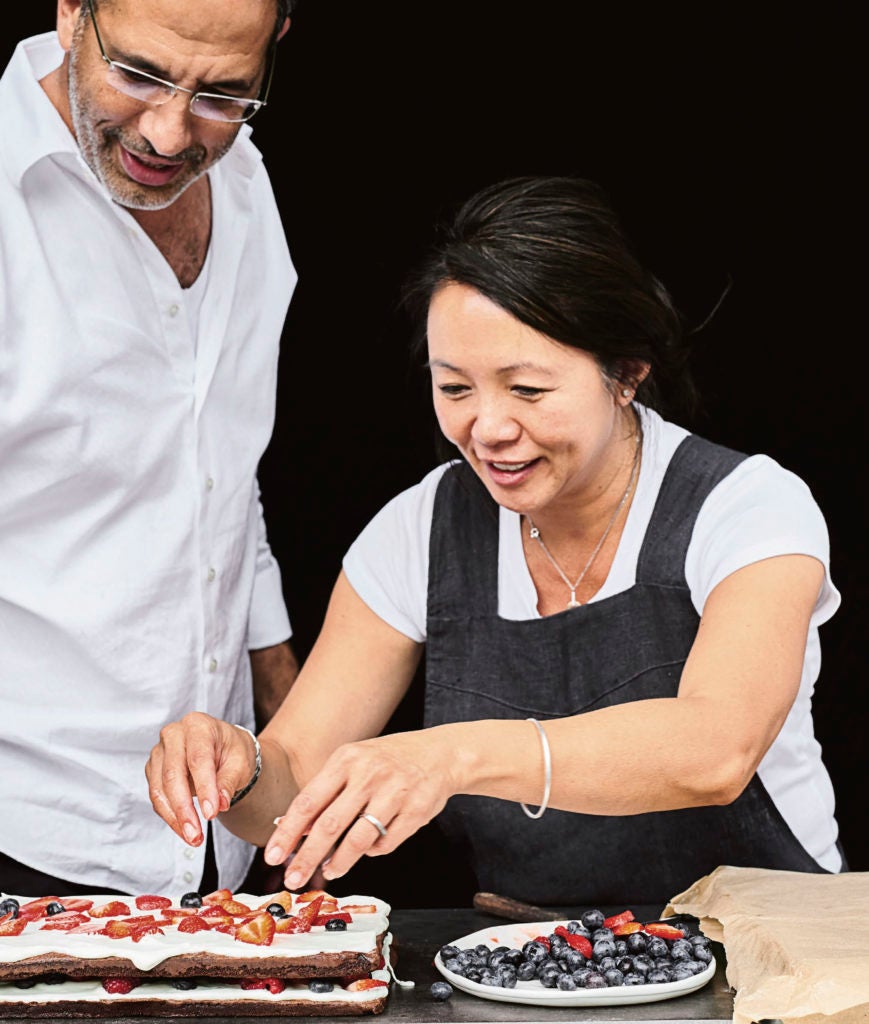
Ottolenghi and Goh in the kitchen
You mentioned a really key word. You said “weigh.” I think a lot of Americans, we don’t really use digital scales. We use cups. How do you negotiate that?
YOTAM: I want to convert all Americans to weigh. To use the scale. Because scales are like a hundred times more accurate. Well, they’re just accurate, and cups are inaccurate. It’s a black-and-white thing for me. When you weigh flour, you know exactly how much goes in the tin. When you put it in a cup, you don’t know how much air is trapped in between the grains. Or one flour is a bit more airy than the other.
We’ve been talking about how beautiful all of the recipes are visually. What are both of your favorite really ugly things to bake, when you know there won’t be any cameras?
HELEN: I actually prefer ugly food. I like good ugly food.
Me too. There’s less pressure.
HELEN: Less pressure. I like things like curries—do you mean sweet or anything?
Yeah, sweet things. What’s your favorite ugly sweet thing?
HELEN: Oh no, sweets always have to look good.
YOTAM: But I think we should differentiate between ugly and plain. I think plain often doesn’t make it to the pages of the book. But it still looks good. But it just doesn’t have the wow factor visually.
HELEN: They’re beautiful in their simplicity. I like really simple things.
YOTAM: I agree. So when you put a book together, or when you sell food, you need to think, Oh, what’s going to catch the eye?
Are there any tips that you would say to a home baker, that you would like to break through the anxiety of, well, baking?
HELEN: You know, it sounds really boring, but if you can read the recipe through first—it sounds really boring and people don’t do it. They think—they just want to get on and start cooking. But if you can read through everything and do your mise en place, get it all laid up, because so many times, you’ve got three eggs and you need four, and then you’re halfway through, and you’re toast.
Yeah, you’re totally toast, yeah.
HELEN: And also when you have all your things laid out, and you’ve got a road map, having read what you’re doing, you can enjoy the process rather than tearing around the kitchen grabbing this and hurrying and you kinda—it’s stressful. Or you can actually just really enjoy baking. And why not do that?
Why not?
HELEN: And people don’t do it because they just think, Oh I just want to get it done, I can’t be bothered. Read the recipe before, take the butter out of the fridge an hour before if it’s room temperature butter, because that makes all the difference to a cake. It means that you can properly cream the cake, rather than jabbing it in the microwave, and then it’s melted and pooled and then you can’t cream it properly. So if you set up, you will—that’s 60 percent of your work done. Eighty percent of your work done.
I get stressed just thinking about it.
HELEN: Yeah. Well, that’s the thing, that’s the difference. And I’m a really impatient person, so it took me years to realize that. And I think I literally grew a foot taller as a chef when I changed that mentality.
Have you been meeting a lot of people who have already baked things?
HELEN: Loads, loads. On Instagram. I have this thing—every Saturday morning, I collect all the people who’ve tagged me, and I do a kind of collage of all their bakes. And I’m absolutely bowled over by how many people are cooking from it, and thrilled that everyone’s cooking something different! Because usually, there’s—one recipe stands out and everybody cooks it. But it’s been, like, everything!
Is there one that’s the most popular recipe that you’ve seen a lot?
HELEN: The madeleines, because I think people are still easing their way into it, and that’s a small cake—it’s a low-risk investment to bake, and the yo-yos they’ve baked a lot, too. The banana pecan cookies. Oh, the striped cake.
It’s so pretty. I guess it’s a sign it’s a good recipe if people are making it and it’s working.
HELEN: Yeah! I mean, someone tagged me the other day— I said “Look, it looks even better than ours!”
Ingredients
- 1 cup plus 1 1/2 tbsp unsalted butter, cut into 3/4-inch, plus extra for greasing
- 9 ounces dark chocolate (70% cocoa solids), broken into 1 1/2-inch pieces
- 4 large eggs
- 1 ⅓ cups granulated sugar
- ¾ cups plus 3 tbsp all-purpose flour
- ⅓ cups Dutch-processed cocoa powder
- ½ teaspoons salt
- 7 ounces halva, broken into 3/4-inch pieces
- ⅓ cups tahini paste
The combination of tahini, halva and chocolate is so good that some members of staff (Tara, we see you!) had to put a temporary personal ban on eating these particular brownies during the making of this book. It is very hard to eat just one. In order to achieve the perfect balance of cakey and gooey—that sweet spot that all brownies should hit—the cooking time is crucial. It will vary by a minute or so depending on where the pan is sitting in the oven, so keep a close eye on them.
- Preheat the oven to 400°F. Grease your chosen pan and line with parchment paper, then set aside.
- Place the butter and chocolate in a heatproof bowl over a pan of simmering water, making sure that the base of the bowl is not touching the water. Leave
for about 2 minutes to melt, then remove the bowl from the heat. Stir until you have a thick shiny sauce and set aside to come to room temperature.
- Place the eggs and sugar in a large bowl and whisk until pale and creamy and a trail is left behind when you move the whisk; this will take about 3 minutes
with an electric mixer, longer by hand. Add the chocolate and fold through gently with a spatula—don’t overwork the mixture here.
- Sift the flour, cocoa powder and salt into a bowl, then gently fold into the chocolate mixture. Finally, add the pieces of halva, gently fold through the mix, then pour or scrape the mixture into the lined baking pan, using a small spatula to even it out. Dollop small spoonfuls of the tahini paste into the mix in about 12 different places, then use a skewer to swirl them through to create a marbled effect, taking the marbling right to the edges of the pan.
- Bake for about 23 minutes, until the middle has a slight wobble and it is gooey inside—they may be ready anywhere between 22 and 25 minutes. If using the 12 x 8-inch, they will need a couple minutes less cooking time. They may seem a little undercooked at first, but they firm up once they start to cool down. If you want to serve them warmish (and gooey), set aside for just 30 minutes before cutting into 16 pieces. Otherwise, set aside for longer to cool
to room temperature.
Ingredients
- 8 large eggs, whites and yolks separated
- ⅔ cups plus 2 tbsp granulated sugar, plus 1 1/2 tbsp
- 1 tablespoon lemon juice, plus finely grated zest of 1 small lemon
- ½ cups plus 1 tbsp all-purpose flour
- ⅛ teaspoons salt
- Confectioners’ sugar, for dusting
- Blackcurrant (or Mixed Berry) Purée
- 10 ½ ounces blackcurrants (or mixed berries), fresh or frozen and defrosted, plus 1 1/2 oz to garnish
- ¼ cups granulated sugar
- Blackcurrant (or Mixed Berry) Buttercream
- ¼ cups light corn syrup (or golden syrup)
- ½ cups plus 1 tbsp granulated sugar
- Scraped seeds of ½ vanilla pod
- 4 large egg yolks
- 1 ¼ cups plus 1 tbsp unsalted butter, cut into 1-inch cubes, softened
- ½ cups black currant (or mixed berry) pureé
We had a momentary wobble as the recipes for Sweet were coming together that there was not enough color. Yotam ran off to his local grocer to get as many bright berries as he could, and the refrain of the week was: color, color, color! This tall, conical showstopper of a cake is one of the happy outcomes. It starts its life, simply, as a flat sponge cake in a baking sheet. Rolled up and covered in silky buttercream, it looks rather like a barrel. Cut into it, however—revealing the stripes!—and it looks like a whole lot of vertically inclined (and very colorful) fun.
- Preheat the oven to 400°F. Line a shallow rimmed baking sheet
(approximately 15 x 12 inch) with parchment paper and set aside.
- Place the egg yolks in the bowl of an electric mixer with the whisk attachment in place. Add the 2/3 cup plus 2 tbsp granulated sugar and the lemon juice and beat on medium-high speed for about 3 minutes, until pale and thick. Transfer the mixture to a large mixing bowl and sift the flour and salt directly over the egg mixture in two batches, folding through the mixture with a rubber spatula after each addition. Sprinkle the lemon zest on top and set aside
- Place the egg whites in a clean bowl of an electric mixer with the whisk attachment in place. Whisk on medium-high speed until soft peaks form, then slowly pour in the 1 1/2 tbsp granulated sugar. Continue to whisk until firm peaks form, then gently fold a third of the egg whites into the egg yolk mixture until incorporated. Finally, fold in the remaining egg whites until combined, then scrape the mixture into the lined baking sheet. Even the surface out with a small spatula and bake for 15 minutes, or until light golden brown and a toothpick inserted into the center comes out clean.
- Remove from the oven and place on a wire rack to cool in the pan for 5 minutes before dusting the top lightly with confectioners’ sugar. Place a clean kitchen towel on top of the sponge cake and then flip it over so that it is now lying on top of the kitchen towel. Carefully peel away the paper and trim the very edges of the sponge. Be careful not to cut away too much; you really just want to straighten out the edges. Starting at the shorter edge of the cake, carefully roll it up (along with the kitchen towel). This is to “train” the cake, ready for rolling up again later. After about 20 minutes, or when no longer warm, unroll the cake. With the short end facing you, measure and cut three equal strips parallel to the long edge, each about 4 inches wide. (If you have a pizza cutter, this is a really easy way to cut the strips.) Cover with a clean kitchen towel and set aside.
- To make the purée, place the blackcurrants (or berries) and granulated sugar in a medium saucepan and place over medium-low heat. Warm through for 4–5 minutes, until the blackcurrants (or berries) have softened and the sugar has dissolved. Transfer to a food processor and process to form a purée. Strain through a fine-mesh sieve set over a bowl to catch the purée; you need 2/3 cup, so save any extra in the fridge to spoon over yogurt.
- To make the buttercream, place the corn syrup (or golden syrup), granulated sugar and vanilla seeds in a medium saucepan. Place over low heat and stir until all the sugar dissolves; this is your sugar syrup.
- While the syrup is cooking, place the egg yolks in the bowl of an electric mixer with the whisk attachment in place. Beat on medium-high speed until thick and pale yellow in color. Leave the machine on while you check the sugar syrup; when all the
sugar has melted, stir again, increase the heat to medium and simmer until bubbles begin to appear. Swirl the pan gently and continue to simmer until there are large bubbles all over the surface of the syrup. Remove the pan from the heat and carefully pour the hot syrup in a slow, steady stream down the edge of the mixing bowl into the beating yolks. When all the syrup has been added, increase the mixer speed to high and continue to beat the mixture for about 10 minutes, until the outside of the bowl is no longer warm. Gradually add the butter, one cube at a time, allowing it to be incorporated into the mixture before adding the next. When all the butter has been added, scrape down the bowl and continue to beat for another minute, until the buttercream is very smooth and light. Add a scant 1/2 cup of the blackcurrant (or mixed berry) purée and beat on medium speed until fully incorporated.
- Spread each of the strips of sponge with about 3 oz of the buttercream; this should leave about 10 1/2 oz to frost the top and sides of the cake. Take one strip of sponge and, starting with the short end, roll it up. Once this strip is rolled, position the exposed end at the beginning of the next strip and keep rolling. Again, once this is rolled—the cylinder will be getting wider now—position the exposed end at the beginning of the last strip and continue to roll. You now have a rolled cylindrical cake! (Imagine, for a moment, if you lined up the three strips end to end to create one very long strip. Then imagine rolling that very long strip up, from one end to the other. You should end up with a coiled barrel shape.) Turn the cylinder onto the serving plate so that it is standing on one of its flat ends.
- Spread the remaining buttercream all over the top and sides of the cake, smoothing with a spatula to create an even surface. Dribble the remaining 1/4 cup blackcurrant (or mixed berry) purée on top of the cake and top this with the blackcurrants (or berries) reserved for garnish. Set aside for 1 hour at room
temperature (or in the fridge if it is a very warm day) before serving.
Ingredients
- 2 ¼ cups blanched hazelnuts
- 3 ½ tablespoons all-purpose flour
- 5 ½ ounces chocolate (70% cocoa solids), roughly chopped
- 1 cup almond meal
- 1 cup unsalted butter, at room temperature, roughly cubed, plus extra for greasing
- 1 ¼ cups granulated sugar
- 6 large eggs, whites and yolks separated
- 1 ½ cups ricotta cheese
- 2 teaspoons vanilla extract
- ¼ teaspoons salt
- Water Ganache
- 3 ½ ounces dark chocolate (70% cocoa solids), roughly chopped into 3/4-inch pieces
- 3 tablespoons granulated sugar
- 2 ½ tablespoons light corn syrup
- ⅓ cups water
- Scraped seeds of ¼ vanilla pod
- 3 tablespoons unsalted butter, at room temperature, cut into 3/4-inch cubes
Unlike most other cheesecakes, this doesn’t need to be made ahead of time in order to chill and set. In fact, it tastes best served a little warm. It’s not what people expect from a cheesecake—there’s no crunchy base and it’s served warm from the oven—but in Italy, where they certainly know how to “do” ricotta, nearly all cheesecakes are more of a warm, moist cake like this (although you can serve it from the fridge, if you like). With thanks to Laura Jane Stewart, pastry chef at our Ledbury shop, for this recipe.
- Preheat the oven to 350°F.
- Lightly grease the sides of ten individual 3-inch round cake rings and line the sides with parchment paper—you want the paper to rise 3/4 inch above the top of the ring—then place on a large baking sheet that is also lined with parchment paper. (Once the rings have been filled with the cake mixture, they cannot be moved, so arrange them on the baking sheet as you want them to be baked.) If using a muffin pan, line the base of the molds with a circle of parchment paper and grease the sides. If using a 9-inch springform pan, grease and line the base and sides—again, the paper should rise 3/4 inch above the sides of the pan—place the pan on a baking sheet and set aside.
- Spread the hazelnuts out on a rimmed baking sheet and roast for 10 minutes, until they have taken on just a little bit of color. Remove from the oven and set aside until completely cool (if you process them when they are warm, they will turn to an oily paste). Roughly chop 1/3 cup of the cooled nuts (it’s okay if a few remain whole) and set aside—they will be used to garnish—and place the remainder in the bowl of a food processor, along with the flour. Process until fine, then tip into a medium bowl. Place the chocolate in the food processor, pulse to form large crumbs and add these to the hazelnuts and flour. Add the almond meal, mix together and set aside; the texture is a bit rustic here, which is what you want.
- Increase the oven temperature to 375°F.
- Place the butter and sugar in the bowl of an electric mixer with the paddle attachment in place. Beat on medium-high speed for about 3 minutes, until light and creamy. Add the egg yolks, one at a time, beating well after each addition. Turn the speed to low, add the chocolate-nut-flour mixture and continue to mix until just
combined. Remove the bowl from the machine and stir in the ricotta, vanilla extract and salt. Transfer the cake mixture to a separate large bowl and set aside.
- Wash and dry the bowl of the electric mixer very well before adding the egg whites to it. Beat the whites on medium-high speed until stiff, then use a large spatula to fold the egg whites, in two or three batches, into the cake mixture. Scrape the
mixture into the pans, filling them to the top of each ring. Bake for 30–35 minutes if using the individual cake rings, 20 minutes if using a muffin pan, or about 60 minutes if making it in one large pan, rotating the baking sheet halfway through, until golden brown and a skewer inserted into the middle comes out more or less clean; it might have a few crumbs attached but should not be wet. Remove from the oven and set aside to cool completely. Remove the cakes from their pans, peel away the paper and set aside. If you are making one large cake and it is a bit cracked on top, don’t worry; rustic is fine here and the chocolate ganache will cover it completely.
- To make the water ganache, place the chocolate in a medium bowl and set aside. Put the sugar and corn syrup in a small saucepan and place over medium-low heat. Stir to combine and, when the sugar has melted, increase the heat to medium and
bring to a boil, stirring gently from time to time. Continue to boil for about 5 minutes, until the color is a pale amber. Remove from the heat and carefully pour in the water; don’t worry if the mixture seizes. Return the pan to the heat, add the scraped vanilla seeds and stir gently and continuously until it returns to a boil. Remove from the heat and wait for a minute before pouring the water-caramel over the chocolate. Allow to stand for 5 minutes, then whisk to combine. Add the butter, a couple of cubes at a time, whisking after each addition. Continue until all the butter has been added, whisking to combine until the mix is smooth and shiny. Remove from the heat.
- Spoon the ganache over the cakes, letting it drip down the sides. Sprinkle with the reserved hazelnuts and serve.