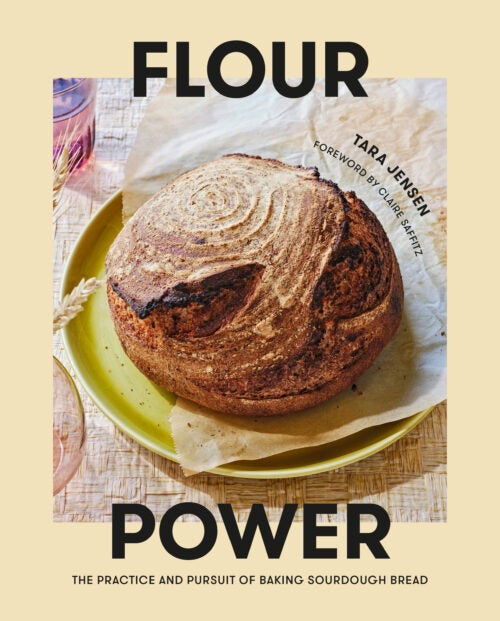
Marbled Deli Rye
Ingredients
Directions
MALTED DOUGH
236 g
bread flour

177 g
water
49 g
molasses blackstrap
47 g
sourdough
5 g
salt
WHITE DOUGH
229 g
bread flour
25 g
light rye flour
190 g
water
51 g
sourdough starter
5 g
salt
ADDIOTION
28 g
caraway seeds
Marbled Deli Rye
This marbled bread made from a malted dough (with molasses) and a white dough (with 10% rye flour) is the rye used for Reubens!
1 BÂTARD AT 1KG | 9-INCH OVAL
- SNAPSHOT: Refresh the sourdough starter 6 to 10 hours before mixing and folding two separate doughs. The doughs are layered together into one dough before shaping. The shaped dough is proofed overnight and baked the next day.
THE NIGHT BEFORE: SOURDOUGH STARTER REFRESH
- Refresh your sourdough starter the night before or up to 10 hours prior to mixing the dough.
DAY ONE: MIXING, FOLDING, SHAPING, PROOFING, AND CHILLING
- Mix the malted dough: In a large bowl, thoroughly mix together the bread flour, water, molasses, starter, and salt by hand until there are no patches of dry flour. You can squeeze the dough through your hands, like extruding pasta between your fingers! The dough will be sticky, gluey, and shaggy.
- Mix the white dough: In a large bowl, thoroughly mix together the bread flour, light rye flour, water, starter, and salt by hand until there are no patches of dry flour. You can squeeze the dough through your hands, like extruding pasta between your fingers! The dough will be sticky,gluey, and shaggy.
- Pop a digital thermometer into each dough—they should be between 75° and 81°F. (If the doughs are above 81°F, stick them in a cool spot—not the refrigerator—until they cool to between 75° and 78°F. If they are cooler than 75°F, place them in a warm location until they reach between 75° and 78°F.) Cover each bowl with a dinner plate or sheet pan for a lid and let rest for 1 hour.
- Fold: Once the doughs are relaxed, you will give them a series of three folds spaced 1 hour apart. To fold, smear a little water onto your work surface. Using a dough scraper, gather the malted dough together and, with a quick motion, scoop the dough up with the dough scraper and flip it onto the wet table. Using your hands, lift the dough off the table, then slap the bottom half down so that it sticks a little. Gently leaning back, stretch the dough and then quickly lean forward, tossing the dough still in your hands over the portion stuck to the table. Repeat three to four times. The dough will become smooth and pull itself into a ball.
- Using the dough scraper, return the dough to its container, smooth-side up, cover with the plate or sheet pan, and let rest for 1 hour. Repeat the process with the white dough. Repeat the process on each dough two more times, with 1 hour between folding sessions.
- Pre-shape: Lightly dust your table with flour. Use a dough scraper to flip both doughs onto the table. Using a bench knife, cut each dough into 4 roughly equal pieces and sprinkle each with caraway seeds. (If you love caraway, you can be generous here.) Now stack the individual portions of dough, sprinkled with caraway, one on top of the other, alternating between malted and white.
- Pat and press into a rectangle with a short side facing you. Bring the short side of the dough closest to you to the top (the edge farthest from you), leaving a 1-inch lip. Take the sides of the dough, gently stretch each outward a few inches, then quickly cross them over each other so they are on top of each other, like swaddling a baby. Next, stretch the edge of the dough closest to you up to the top, flush with the top edge. Gently press to create a seam.
- Use your hands or a bench knife to gently drag the loaf on the table to create surface tension. You will see it tighten and become smooth as you drag. Make sure the top stays the top and the dough doesn’t roll over as you go. The dough will curl into itself, so the seam is now on the bottom and the top is smooth and roundish.
- Bench rest: Sprinkle the dough with flour, cover with a kitchen towel, and let rest 30 minutes.
- Final shape Lightly dust a cloth-lined 9-inch oval banneton with flour and set aside. Lightly dust the table with flour. Use a bench knife to flip over the pre-shape so the top is now the bottom. Bring the bottom of the dough to meet the top edge, leaving a 1-inch lip at the top. Gently stretch the sides outward a few inches, then quickly cross them over the middle of the dough, like swaddling a baby. You’re now looking at an envelope shape. Stretch the bottom of the dough up to meet the top of the envelope and press down to seal. The dough will now be a cylinder on its side with a seam facing away from you. Roll the seam underneath and seal the left and right ends using the edge of your palm. With the bench knife, flip it seam-side up, into the banneton.
- Proof: Loosely cover the banneton with a kitchen towel and proof in a draft-free spot at room temperature for 2 to 3 hours. When fully proofed, the loaf will appear to have doubled in size, feel full of air, and pass the poke test (see page 55).
- Chill: When proofed, transfer the banneton, covered with a shower cap or kitchen towel, to the fridge for at least 6 hours and up to 24.
DAY TWO: BAKING
- Preheat the oven: Set a combo cooker on a rack in the oven so the skillet is on the bottom and the pot is inverted as a lid. Preheat the oven (and the combo cooker) to 500°F.
- Score: Wearing welding gloves, remove the combo cooker from the oven (it’s hot!) and quickly toss the cold dough seam-side down onto the hot skillet portion of the cooker. Use a lame and razor, with the blade at a 35-degree angle, to score in one long stroke, running lengthwise along the top of the bread.
- Bake: Immediately cover the bread with the inverted pot for a lid and load it back into the oven. Bake for 15 minutes. Remove the combo cooker from the ovenand set on the stovetop. Remove the lid (be careful of hot steam) and reduce the oven temperature to 475°F. Return the bread, still on the skillet portion of the combo cooker, to the oven and bake another 15 to 20 minutes, or until the loaf is deeply browned, reaches an internal temperature of 190°F, and sounds hollow when tapped on the bottom. Carefully remove the bread from the skillet and cool completely. Store for up to 5 days, cut-side down, in a paper bag tucked inside a cloth bag.