It’s a well-known fact that cooking a chicken under a brick (or skillet) helps get that allover golden crust, but how does the technique translate to vegetables?
No plant has been offered up as a chicken substitute quite as often as cauliflower. Roasted whole, the vegetable has taken the place of crackly-skinned chickens in the center of the table. Little bites have been battered, fried, and coated in gochujang to approximate Korean fried chicken. And entire florets have been dressed to look like little drumsticks.
The problem with treating vegetables exactly like meat is that the two are chemically very different, so they behave differently in the presence of things like salt and heat. You can’t salt and rest a whole sweet potato, toss it in a screaming-hot, dry skillet, and expect it to come out like a rib eye—all you’ll get for your efforts is dry, charred-in-spots skin and uncooked flesh. The same goes for a piece of cauliflower.
Due to their irregular surfaces, high water content, and lack of subcutaneous fat, getting a proper, edge-to-edge crust on vegetables—while cooking them through—can be extremely difficult. One solution takes inspiration from the classic “chicken under a brick” technique, in which a whole butterflied chicken is pressed, breast-side down, onto a very hot grill or skillet with a foil-wrapped brick (or, more commonly, a cast-iron skillet).
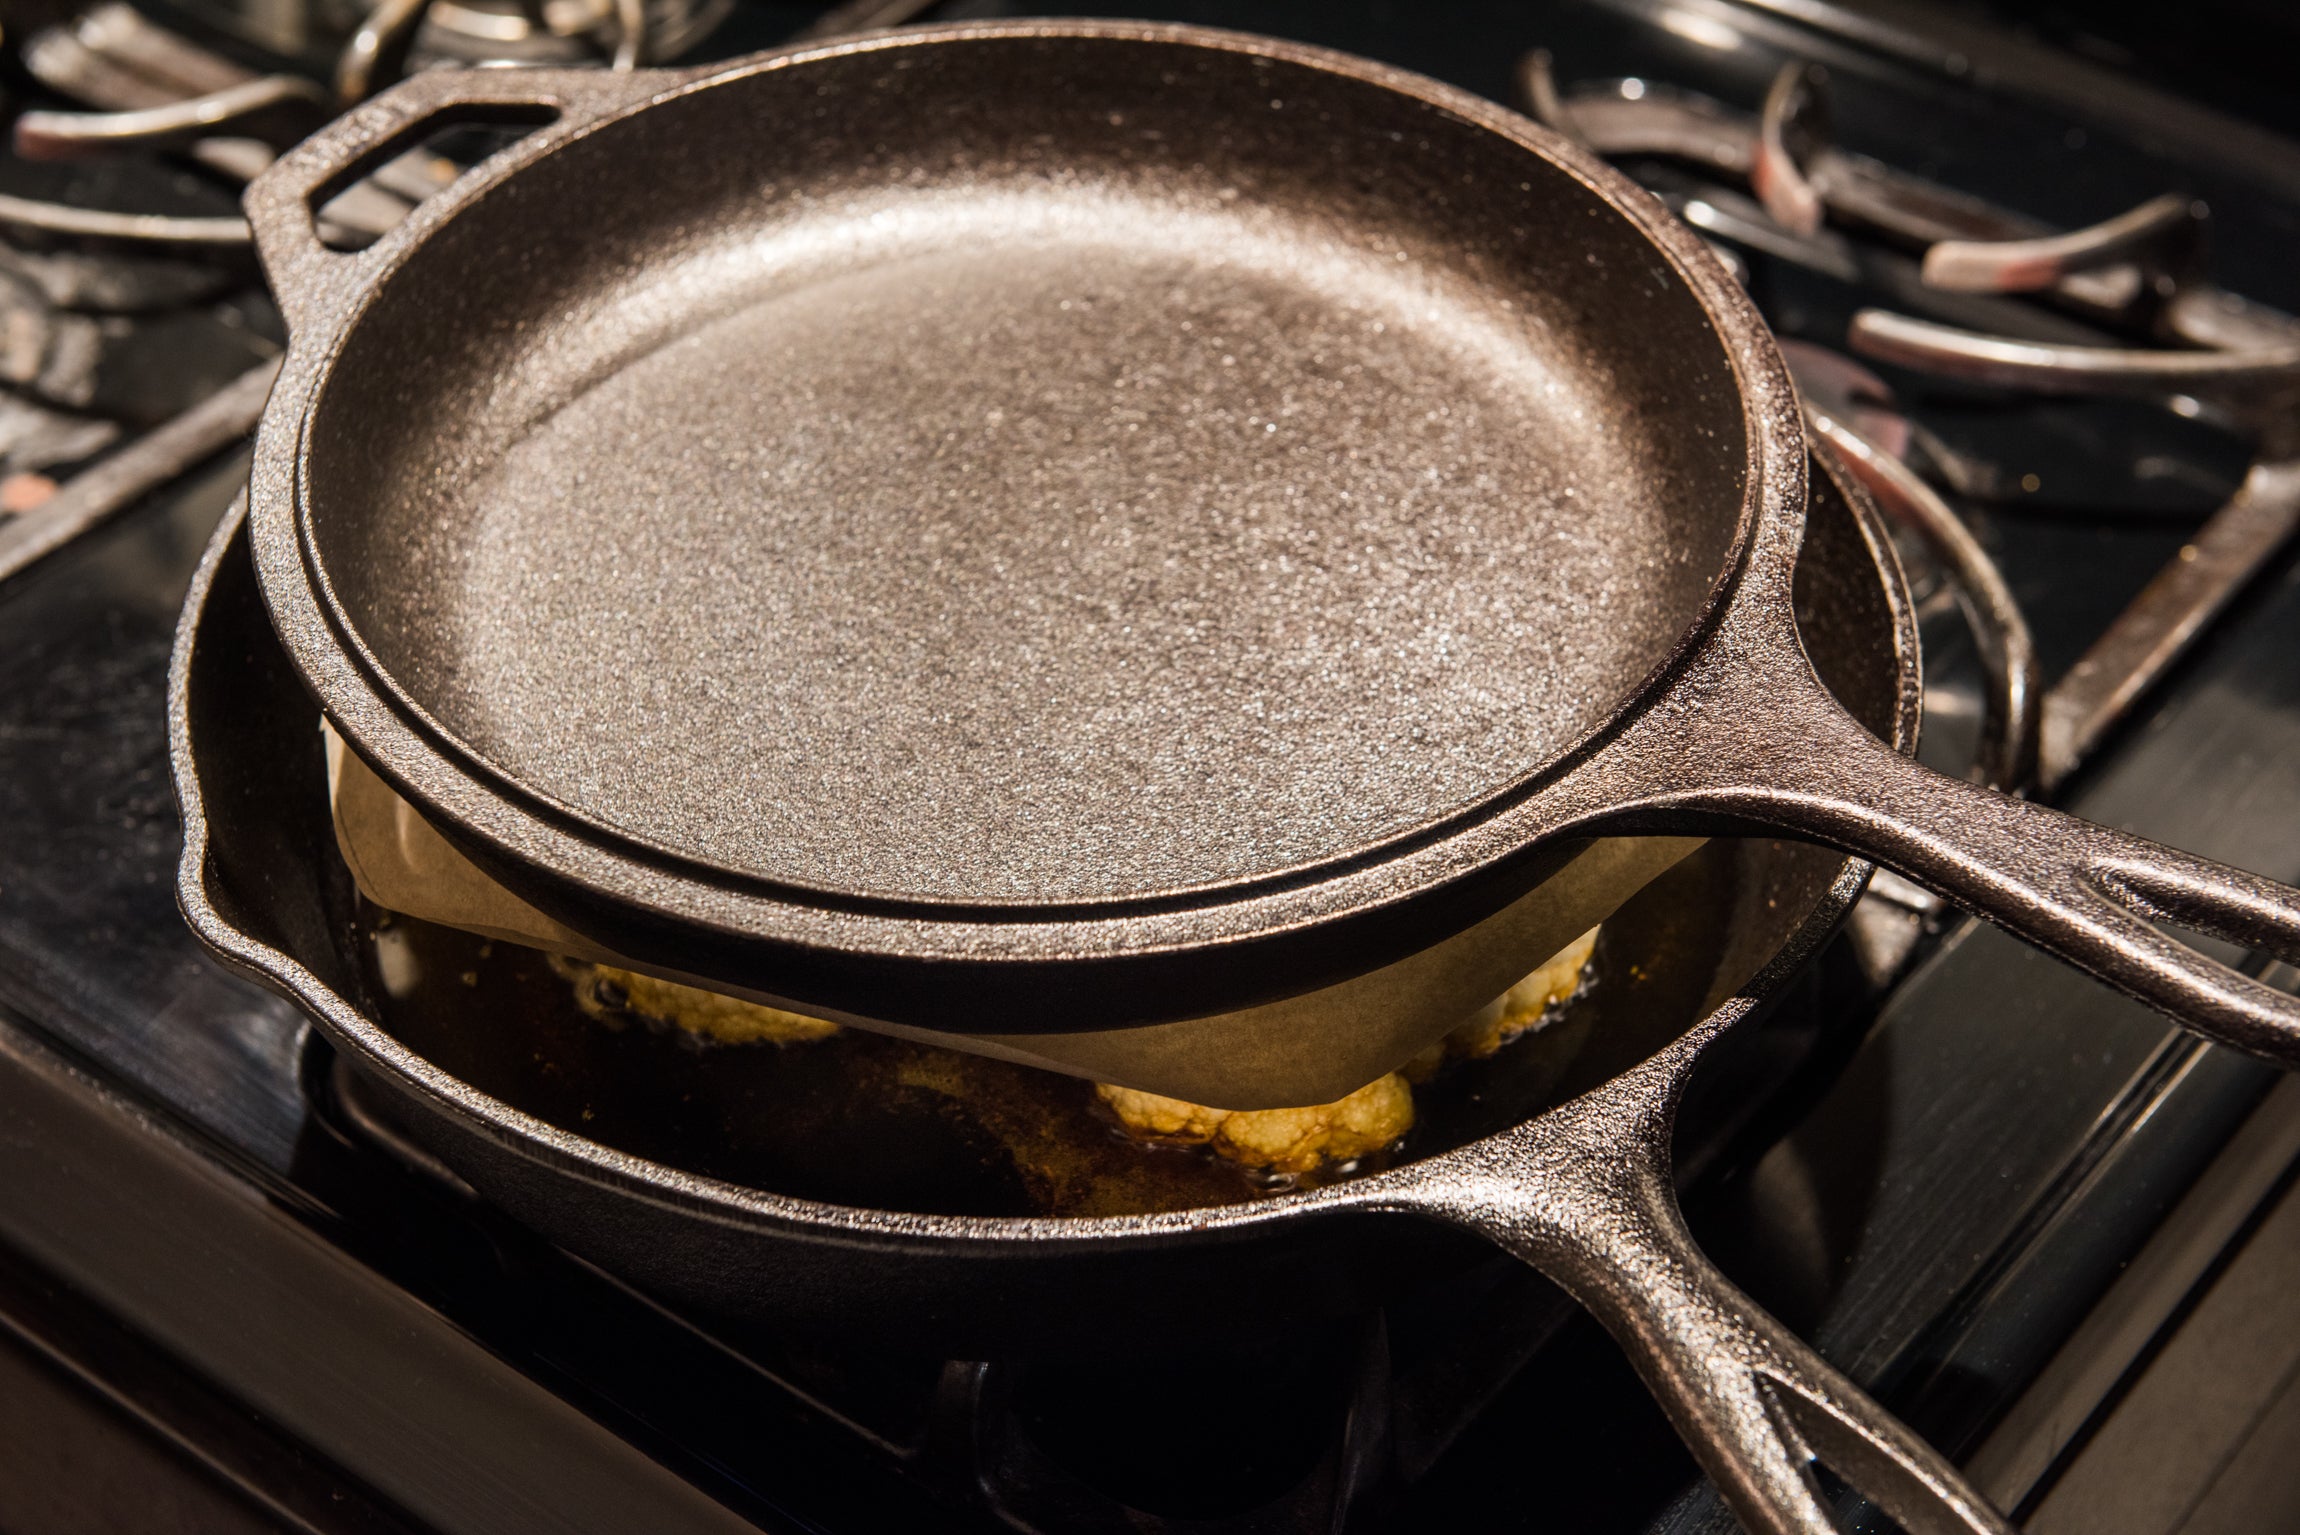
The weight and pressure exerted by the brick (or skillet) ensure that every last bit of chicken skin—and the fat underneath it—are in constant contact with a hot surface. This renders as much fat as possible, ensuring that the skin comes out not only crispy and golden, but uniformly so. Plus, it helps the whole thing cook faster, giving the white meat less time to dry out. The end result is pretty much the pinnacle of roasted chicken: crispy, fatty skin and truly juicy meat, all in record time.
So how does one translate this technique to a different kind of bird altogether—one with no fat to render? It all comes down to careful prep work, aggressive seasoning, lots of oil, and the right temperature.
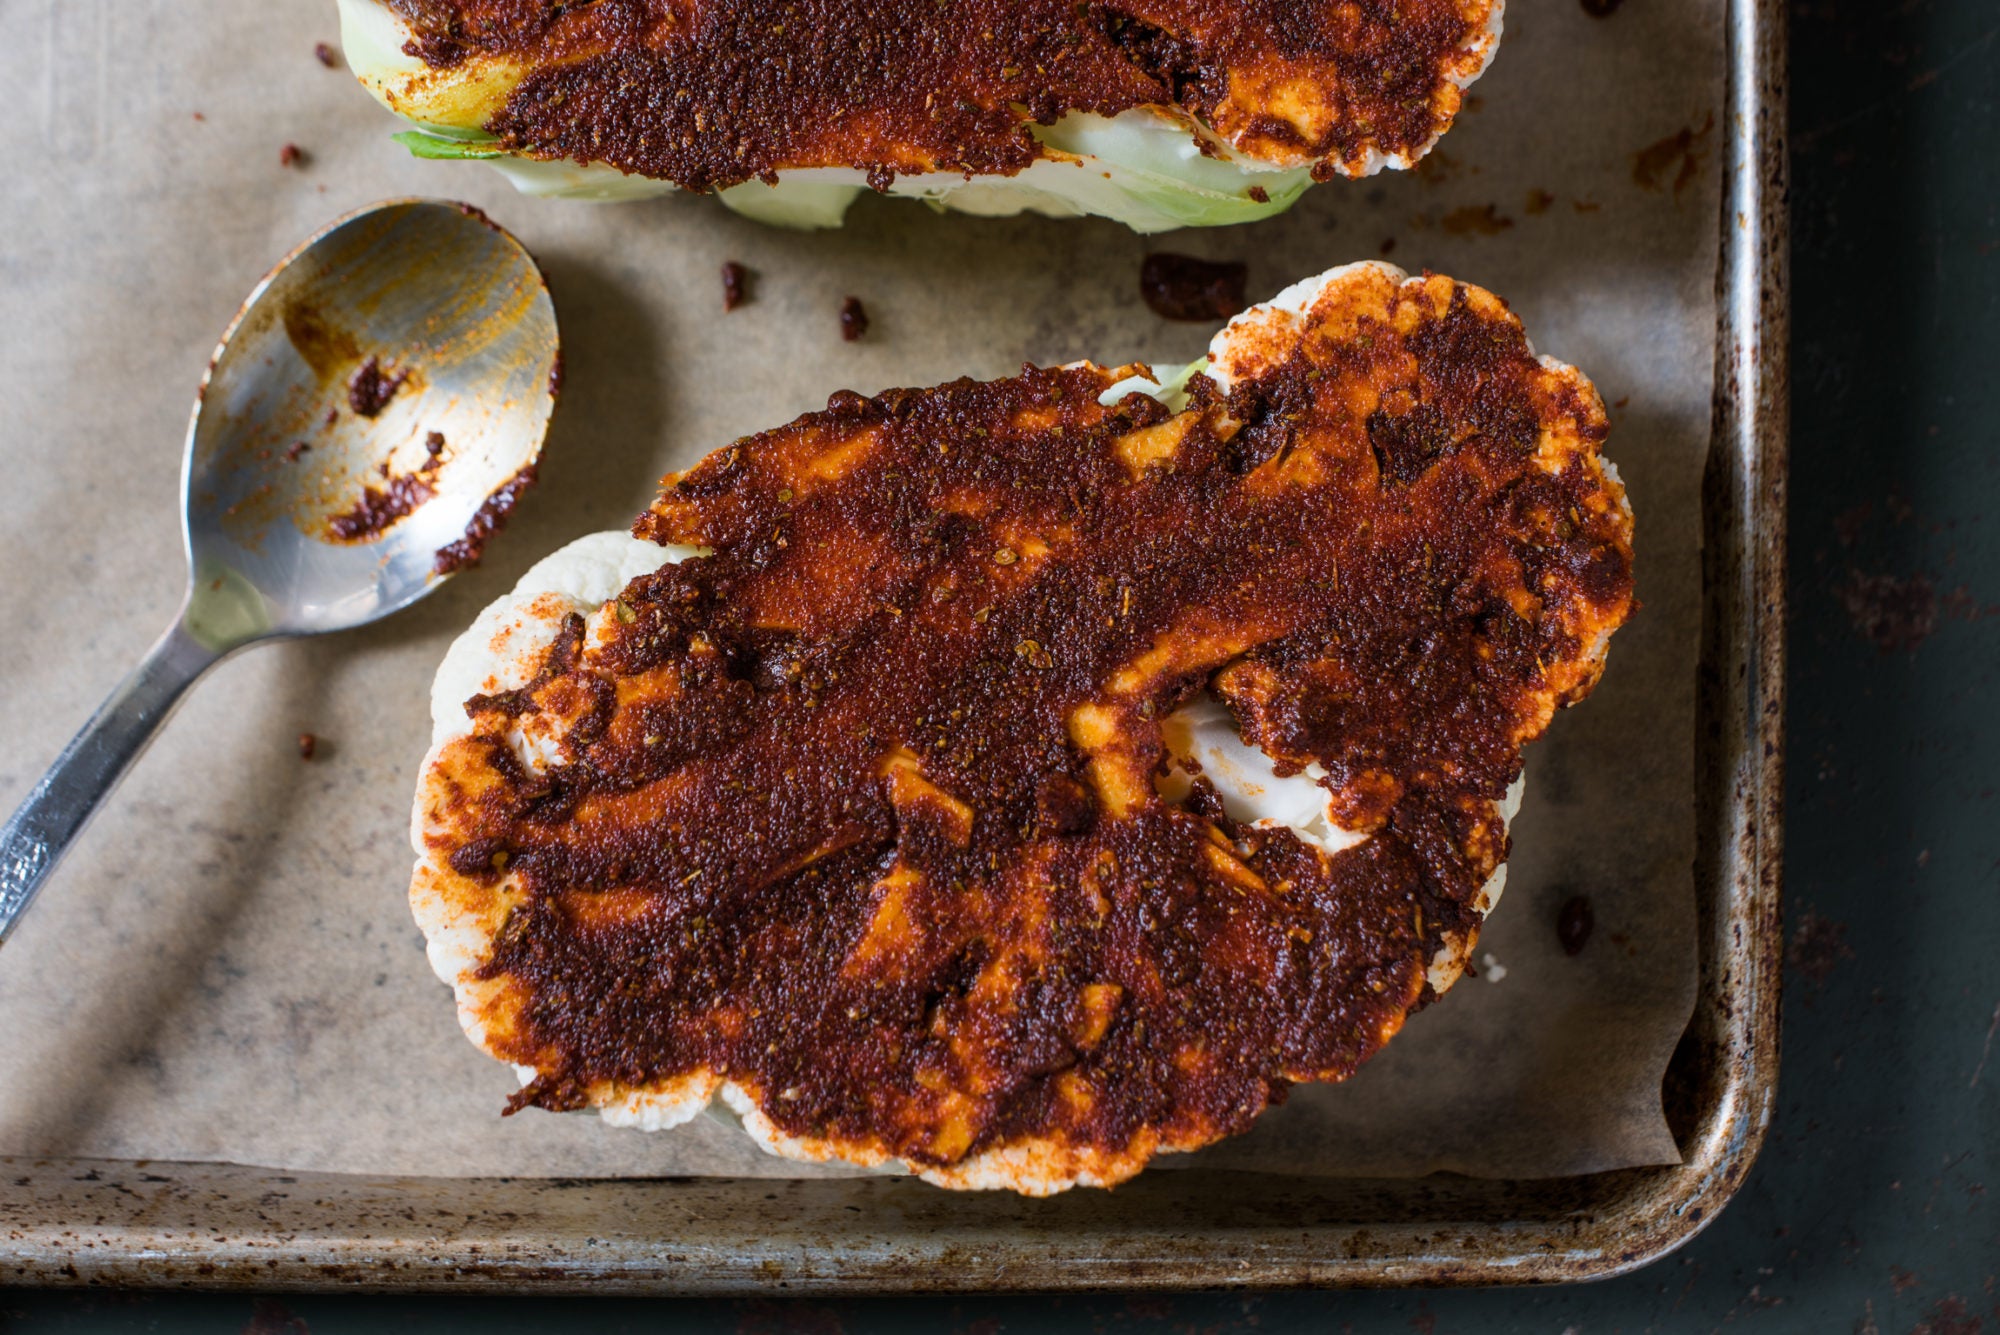
First things first: if you want to press something into a skillet, you need at least one flat surface to work with. With a chicken, you do this by removing the backbone so the whole bird opens up like a book; with cauliflower, you just have to slice it in half lengthwise through the core. This exposes the stem, creating the perfect surface for pressing into a hot skillet. Trimming off some of the rounded florets creates another flat surface on the opposite side, and lightly scoring the exposed stem gives a spice rub somewhere to go.
An intense mixture of paprika, cumin, and MSG-spiked adobo seasoning brings bold flavor; a drizzle of oil binds everything together, adds richness, and encourages the spices to caramelize rather than burn. Once you’ve seasoned it up, it’s a waiting game: steady, medium-low heat is the secret to this recipe, so you need a little patience. And although there’s a lot of waiting—for your skillet to heat, for a generous amount of oil to do the same, and finally for the cauliflower itself to finish cooking—you can still have this on the table in about 30 minutes. The result is a perfectly even, deep brown exterior, well-seasoned flesh, and a surprisingly short cook time.
Brassicas are far and away my favorite vegetables to use here because they take so well to caramelization. This particular recipe calls for cauliflower, but it would work equally well with broccoli, romanesco, or even fat slices of red cabbage. Speaking of spices, feel free to use your favorite blend; this is just mine.